
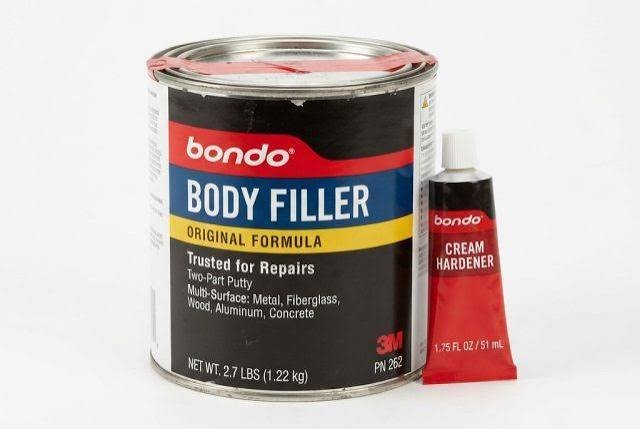
How to Mix Bondo Body Filler Using the 1900 Hardener Ratio for Strong, Bubble-Free Repairs
Mixing body filler correctly is the foundation of every successful auto body repair. Too much hardener and your Bondo will kick off before you can spread it; too little and it stays tacky for hours or never fully cures. Getting the ratio right — especially when working with our 1900 hardener — ensures you have enough working time to apply the filler smoothly while achieving a rock-hard cure that sands clean and holds paint.
We’ve seen every mixing mistake in the book, from streaky blends that leave soft spots to over-catalyzed batches that harden on the mixing board. This guide walks you through the exact process we recommend: the right proportions, the tools that make mixing faster, and the techniques that eliminate air bubbles and ensure even hardener distribution every time.
Understanding the Correct Hardener-to-Filler Ratio
The standard mixing ratio for Bondo body filler is roughly 2% hardener by volume — about a golf-ball-sized dollop of filler to a 1-inch ribbon of cream hardener. That 2% baseline applies whether you’re using our original formula or working with the 1900 hardener, which is formulated to provide consistent cure times across a wide temperature range.
More hardener does not mean a stronger repair. Exceeding 3% creates excessive heat during cure, which can cause the filler to crack or pull away from the substrate. In cold weather you may be tempted to add extra hardener to speed the cure, but a better approach is to warm the panel slightly or move to a heated workspace.
Measuring Without a Scale
Most body shops don’t weigh filler batches. Instead, dispense a mound of filler onto a clean mixing board, then squeeze a single continuous bead of hardener across the top. For a palm-sized pile of filler, that bead should be roughly as long as your thumb. If you’re mixing a larger batch, keep the same proportional length — double the filler, double the hardener bead.
Mixing Technique: Avoiding Streaks and Air Bubbles
Once you’ve dispensed filler and hardener, use a clean plastic spreader to fold the two together with deliberate strokes. Scrape across the pile in one direction, then rotate the board 90 degrees and repeat. Continue folding and turning until the color is uniform with no red or cream streaks visible.
Never whip or stir in circles. That motion traps air bubbles, which show up as pinholes when you sand the cured filler. Instead, use a press-and-fold action: press the spreader down into the mixture, drag it across the board, lift, and repeat from a new angle.
When to Stop Mixing
You’ll know the filler is ready when the entire batch is a single uniform pink or tan color (depending on the filler formula) and the texture is smooth and creamy. This usually takes 30 to 45 seconds of folding. Once mixed, you have roughly five to ten minutes of working time before the filler begins to firm up, so mix only as much as you can apply in that window.
Temperature and Working Time Considerations
Ambient temperature has a dramatic effect on cure speed. At 70°F, a properly mixed batch of Bondo will reach tack-free cure in about 15 minutes and be ready to sand in 30. At 90°F, those times can drop by half; below 60°F, cure may take an hour or longer.
If you’re working in a cold garage, consider warming the filler can in a bucket of warm water before mixing — not hot enough to cook the resin, just enough to bring it closer to room temperature. Never try to accelerate cure by adding extra hardener; the chemical reaction generates its own heat, and too much catalyst produces a brittle, stress-cracked repair.
In hot weather, mix smaller batches and work quickly. Some techs keep their filler and hardener in a cooler during summer months to extend pot life by a few minutes.

Tools and Supplies for Clean, Consistent Mixing
A smooth, non-porous mixing surface is essential. Most professionals use a plastic or glass mixing board that cleans easily with a putty knife after each batch. Cardboard is a poor choice — it absorbs resin and leaves fibers in your filler.
Use a flexible plastic spreader rather than a rigid metal blade for mixing. Plastic conforms to the board and scrapes the mixture more completely, ensuring no unmixed pockets of filler or hardener remain. Keep several spreaders on hand so you can grab a clean one for each new batch without stopping to wipe down the last.
For larger repairs that require multiple batches, label your hardener tube with the date you opened it. Hardener exposed to air gradually loses potency, which can throw off your cure times if you’re working from a tube that’s been open for months. According to the Wikipedia article on body filler, polyester resin systems like Bondo rely on peroxide-based hardeners that degrade with prolonged exposure to moisture and oxygen.
Achieving Professional Results With Proper Mixing
Mixing body filler correctly is a skill that takes seconds to learn but pays off in every repair you make. By sticking to the 2% hardener ratio, folding thoroughly to eliminate streaks, and adjusting your batch size to match working time, you’ll produce smooth, fully cured repairs that sand cleanly and accept paint without issue.
We designed our filler and hardener systems — including the 1900 formula — to be forgiving and consistent, but the mixing step is still in your hands. Take the extra 30 seconds to fold the batch completely, avoid the temptation to over-catalyze in cold weather, and keep your tools and workspace clean. Those habits are what separate a repair that looks great for years from one that cracks or shrinks after the first season.
Notes
Excess hardener causes the filler to cure too quickly, generating excessive heat that can warp thin panels or create internal stress cracks. The repair may feel hard initially but often becomes brittle and prone to chipping. Stick to the 2% ratio — a ribbon of hardener roughly one inch long per golf-ball-sized mound of filler.
No. Once you’ve applied the filler, adding more hardener won’t help — it needs to be mixed in before application. If your filler is curing slowly, the issue is usually temperature or old hardener. Warm the work area or replace your hardener tube if it’s been open for several months.
The mixture should be a single uniform color with no streaks of red hardener or base filler visible. Texture should be smooth and creamy. This typically takes 30 to 45 seconds of folding with a spreader. If you see any marbling or streaks, keep folding.
Pinholes are caused by air bubbles trapped during mixing. Avoid whipping or stirring in circles. Use a press-and-fold technique instead: drag the spreader across the pile in straight strokes, rotating the board between passes. This method folds the hardener in without churning air into the mixture.
An opened tube of hardener will remain effective for about six months if you squeeze out any air before recapping and store it in a cool, dry place. Hardener exposed to moisture or heat loses potency over time, which extends cure times and can prevent full hardening.
Cardboard and paper absorb resin and leave fibers in your filler, which weakens the repair and creates texture problems when you sand. Use a non-porous surface like plastic, glass, or metal. A dedicated mixing board cleans easily and gives you a smooth, contamination-free batch every time.