
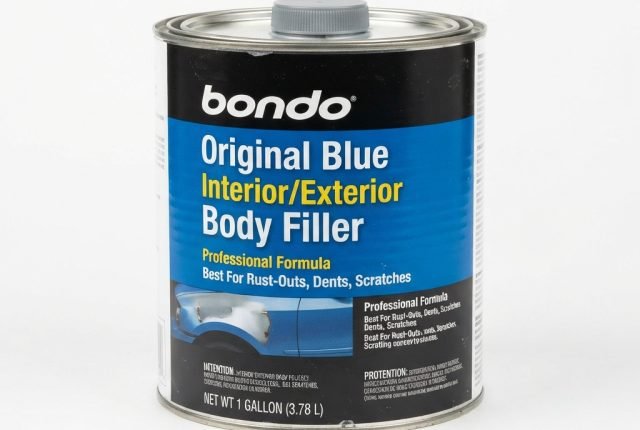
How to Apply Bondo 4400 Body Filler for a Smooth, Professional Finish
Body filler is the backbone of professional automotive repair, and knowing how to apply it correctly makes the difference between a flawless finish and a repair that shows through paint. Our Bondo 4400 body filler is formulated to spread smoothly, cure fast, and sand easily — but only when you follow the right technique.
Whether you’re fixing a dent, filling a rust hole, or smoothing out imperfections, this guide walks you through every step of the application process. We’ll cover surface prep, mixing ratios, spreading methods, and curing times so you get a rock-solid repair that lasts.
Preparing the Surface Before You Apply Filler
Clean metal is everything. Start by grinding away any paint, rust, or primer down to bare metal using an 80-grit disc on an angle grinder. The filler bonds only to clean, abraded steel — anything left on the surface will cause adhesion failure later.
Wipe the area with a wax and grease remover, then let it dry completely. Any moisture, oil, or contaminant will prevent the filler from sticking. For larger repairs, feather the edges of the surrounding paint with 180-grit sandpaper to create a gradual transition zone.
If you’re working over fiberglass or plastic, scuff the surface thoroughly and consider a specialized adhesion promoter. Body filler is designed for metal, and alternative substrates need extra prep to hold.
Mixing Bondo 4400 Body Filler to the Correct Ratio
Squeeze a golf-ball-sized amount of Bondo 4400 onto a clean mixing board — never use cardboard, as it absorbs resin and weakens the cure. Add hardener according to the instructions: typically a strip about two inches long for that volume of filler. The exact ratio matters: too little hardener and the filler stays soft; too much and it kicks off before you can spread it.
Mix thoroughly with a plastic spreader, folding and scraping until the color is uniform with no streaks. Work quickly but deliberately — you have about three to five minutes of working time once the hardener is blended, and the clock starts the moment they combine.
Never mix more than you can apply in one pass. It’s better to mix a second small batch than to waste a large one that hardens on the board.
Spreading and Shaping the Filler
Applying the First Layer
Use a clean plastic spreader held at a shallow angle to push the filler firmly into the repair area. Press down hard on the first pass to force the material into any pitting or texture — this ensures full contact with the metal. Build up the filler slightly above the surrounding surface; you’ll sand it level later.
Work in smooth, overlapping strokes, and avoid going back over areas you’ve already covered. The filler begins to tack up within minutes, and reworking it once it starts to cure creates weak spots and voids.
Building Up Thick Repairs
For deeper damage, apply filler in multiple thin layers rather than one thick coat. Let each layer cure fully — usually fifteen to thirty minutes — before adding the next. Thick single applications trap solvents, stay soft in the center, and crack as they shrink.

Sanding and Finishing the Repair
Once the filler is fully cured and cool to the touch, start shaping it with 80-grit sandpaper on a long sanding block. The block keeps the surface flat and prevents low spots that your hand alone would miss. Sand in long, straight strokes across the repair, checking frequently with your hand to feel for high and low areas.
Move to 120-grit, then 180-grit as you approach the final contour. The goal is a smooth transition from filler to metal with no visible edge. For automotive work, you’ll typically apply a skim coat of primer-surfacer after sanding to fill any remaining pinholes before painting.
Never rush the sanding stage. A poorly shaped repair will telegraph through primer and paint no matter how many coats you apply, and fixing it later means stripping everything back to the filler and starting over.
Getting Professional Results with Body Filler
Applying body filler correctly is a skill that improves with practice, but the fundamentals stay the same: clean prep, accurate mixing, firm application, and patient sanding. When you follow each step deliberately, Bondo 4400 delivers a repair that’s as strong as the metal around it and invisible under paint.
Take your time with the surface prep and don’t rush the cure. Those two habits alone will put you ahead of most DIY repairs, and the results will show in a finish that holds up for years.
Notes
Bondo 4400 is typically ready to sand in fifteen to thirty minutes, depending on temperature and the amount of hardener you used. The filler should feel firm and cool when you touch it.
If it’s still warm or soft, wait longer — sanding too early clogs the paper and leaves a rough, uneven surface. In cold conditions, curing can take up to an hour.
No. Body filler must be applied to clean, bare metal for proper adhesion. Paint and primer prevent the filler from bonding to the substrate, and the repair will eventually crack or pop off.
Always grind or sand down to bare metal, then clean the surface with wax and grease remover before mixing your filler. The extra prep time pays off in a repair that lasts.
Keep individual coats under a quarter inch. Thicker applications trap solvents and cure unevenly, staying soft in the center while the outside hardens.
For deeper damage, build up the repair in multiple thin layers, letting each one cure completely before adding the next. This approach gives you a stronger, more stable repair that won’t shrink or crack over time.
Pinholes are usually caused by air bubbles mixed into the filler during prep. To avoid them, fold and scrape the filler and hardener together gently rather than whipping or stirring aggressively.
If pinholes do appear, apply a thin skim coat of filler or a glazing putty over the sanded area, let it cure, and sand smooth. A final coat of primer-surfacer will fill any remaining tiny voids before you paint.
Adding extra hardener shortens the working time but doesn’t make the filler stronger or more durable. In fact, too much hardener can make the cured filler brittle and prone to cracking.
Stick to the recommended ratio on the tube. If you need faster curing, work in a warmer environment or use a heat lamp from a safe distance — never add extra hardener to compensate for cold conditions.
Yes. Body filler is porous and will absorb moisture if left exposed, causing rust to form under the repair. After sanding the filler smooth, apply an automotive primer-surfacer to seal the surface and provide a uniform base for paint.
Primer also helps you spot any remaining imperfections in the shape before you commit to topcoat. Sand the primer lightly with 320-grit or finer, then apply your paint system as normal.