
Bondo Filler — Automotive Body Repair Compound
We’ve been the go-to name in automotive body repair since 1955, and our original filler compound remains the industry standard for a reason. This two-part polyester filler bonds to metal, fiberglass, and wood to rebuild damaged surfaces with professional strength.
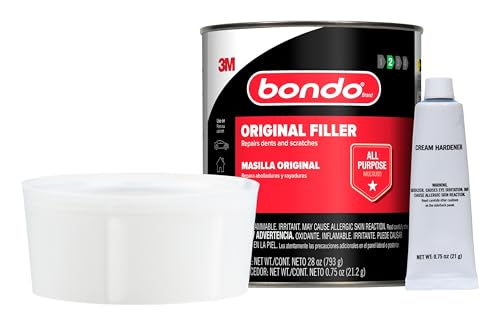


Our filler is a filled polyester resin system — the base contains talc and other mineral fillers suspended in unsaturated polyester, while the red cream hardener is methyl ethyl ketone peroxide (MEKP). When you mix the two components, a chemical reaction (not just evaporation) creates cross-linked polymer chains that lock the filler into a rigid, sandable mass.
Surface preparation and application technique
Clean metal or fiberglass must be sanded to 80-grit roughness before you apply filler — glossy paint, rust scale, and oil contamination all prevent the polyester from bonding. We recommend a DA sander with 80-grit discs to feather the repair area 2-3 inches beyond the damage perimeter, then wipe with wax-and-grease remover on a lint-free cloth.
Apply filler in thin layers — no more than 1/4 inch per pass — using a flexible plastic or metal spreader held at a 30-45° angle to the surface. Pushing the spreader forces filler into the abraded metal’s texture and minimizes air pockets. If the repair requires more than 1/4 inch of build, let the first layer cure fully (30-45 minutes), sand it with 80-grit to create tooth, then apply a second coat.
Shaping and finish sanding
Once the filler has fully cured (you’ll know it’s ready when it turns from pink to tan and produces powder instead of gummy strings when you sand it), start shaping with 80-grit paper on a sanding block or DA. Keep the block flat and use long, overlapping strokes to avoid creating low spots. Check your work with a straight-edge or your palm — high spots telegraph immediately under side-raking light.
Progress through 120-grit and then 180-grit to refine the contour and blend the filler’s edges into the surrounding metal. Stop at 180-grit before priming; finer grits burnish the filler’s surface and reduce primer adhesion. A properly shaped repair should be invisible to the touch — no ridges, no dips, no edge you can catch with a fingernail.
What makes Bondo the standard
Complete your body repair kit


Customer reviews


Common questions about Bondo filler
In a 70-75°F workspace with proper hardener ratio (about 2% by volume), the filler will cure enough to sand in 20-30 minutes. You’ll know it’s ready when the color shifts from pink to tan and the surface feels hard to the touch.
Colder temperatures extend cure time — below 60°F you may wait 45-60 minutes. Warmer conditions speed the reaction, but be careful not to apply thick layers in hot weather or the exothermic heat can cause cracking.
No — Bondo filler must be applied to bare, abraded substrate for proper adhesion. Paint and primer create a barrier that prevents the polyester resin from bonding at a molecular level, and the repair will eventually peel or crack.
Sand the repair area down to bare metal, fiberglass, or wood using 80-grit paper, then wipe with wax-and-grease remover before applying filler. Feather the surrounding paint 2-3 inches beyond the damage so the filler’s edges blend into the existing finish under primer.
We recommend no more than 1/4 inch per layer. Thicker applications trap heat during the curing reaction, which can cause the filler to crack internally or develop pinholes that only show up after you’ve primed the repair.
If you need more than 1/4 inch of build, let the first coat cure completely (30-45 minutes), sand it with 80-grit to create tooth, then apply a second coat. Multiple thin layers cure more evenly and are easier to shape than one thick glob.
Pinholes usually come from trapped air during mixing or application. When you mix the filler and hardener, stir thoroughly but avoid whipping air into the paste — use a folding motion rather than aggressive stirring.
Apply the filler with firm pressure, pushing it into the abraded surface rather than just laying it on top. This forces air out and ensures the resin wets the substrate. For any pinholes that do appear after sanding, fill them with Bondo glazing putty before priming.
Yes — the polyester resin bonds well to aluminum as long as you prepare the surface correctly. Sand the aluminum with 80-grit paper to create mechanical tooth, then wipe it with wax-and-grease remover to eliminate oxidation and oils.
Some body techs prefer to apply a coat of epoxy primer to aluminum before filling, since the primer provides extra corrosion resistance and a chemically active bonding layer. Either way works, but bare aluminum must be freshly abraded — don’t let it sit overnight or the oxide layer will reform.
Before the filler cures, wipe excess product off your spreader with a shop rag, then clean the tool with acetone or lacquer thinner on a fresh rag. Work quickly — once the filler starts to gel, solvents won’t dissolve it and you’ll have to scrape or sand it off mechanically.
Disposable plastic spreaders are inexpensive enough that many body techs just toss them after each use rather than cleaning them. Metal spreaders are worth cleaning if you use them regularly, but let the filler fully cure first, then flex the blade to pop the cured product off in one piece.
Yes — the filler bonds to wood and sands smooth, making it useful for filling gouges, splits, and knots in painted woodwork. Sand the damaged area to bare wood, apply filler, let it cure, then shape it with 80-120 grit paper before priming.
For stained or clear-finished wood, a two-part wood epoxy or traditional wood filler is a better choice — Bondo’s tan color and lack of grain make it obvious under transparent finishes. But for painted trim, cabinets, and furniture, it works as well as any dedicated wood filler and costs less per ounce.