
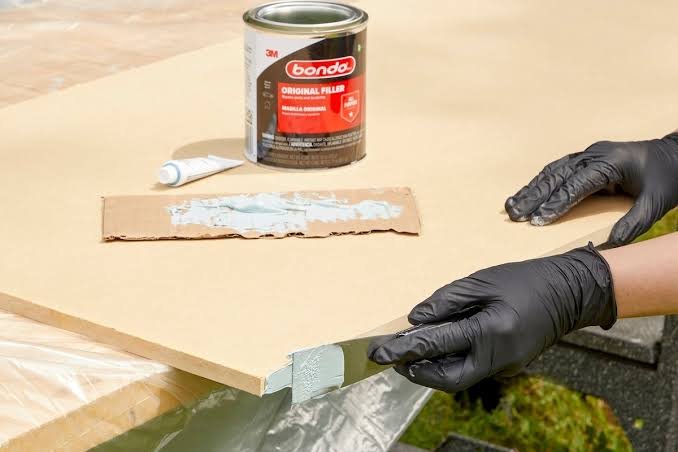
How to Mix Bondo Body Filler in the Right 1900 Ratio for a Smooth, Professional Finish
Mixing body filler correctly is the difference between a repair that sands smooth in minutes and one that stays tacky for hours or cracks after a week. The 1900 approach to mixing Bondo — referring to the precise hardener-to-filler ratio and technique used by professional body shops — ensures you get a workable consistency, proper cure time, and a finish that won’t let you down.
We’ve seen every mixing mistake in the book, from adding too much hardener (which causes the filler to kick off before you can spread it) to undermixing (leaving streaks that never fully harden). This guide walks you through the exact steps, ratios, and timing so your next repair goes on smooth and cures right the first time.
The Correct Hardener-to-Filler Ratio for Bondo
The standard mixing ratio for Bondo body filler is about 2% hardener by volume — roughly a golf-ball-sized dollop of filler to a 1-inch ribbon of cream hardener. The 1900 reference many pros use describes this precise balance: enough hardener to kick off the chemical reaction within 5-10 minutes, but not so much that the filler becomes unworkable in seconds.
Start with a clean polyester resin mixing board (or a scrap of smooth cardboard) and squeeze out the amount of filler you’ll actually use in one session. Add the hardener in a single stripe across the top. You’re aiming for a pale pink or cream color once fully mixed — if it’s bright red or streaky, you’ve either added too much hardener or haven’t blended it through.
Never eyeball the ratio under time pressure. Too little hardener and the filler stays soft indefinitely; too much and you’ll have 90 seconds before it hardens on your spreader.
Mixing Technique: Folding, Not Whipping
Once the hardener is on the filler, use a clean plastic spreader to fold the two together with deliberate, overlapping strokes. Scrape from the outside edge toward the center, flip the pile, and repeat until no streaks remain. This folding motion minimizes air bubbles — the enemy of a smooth finish.
Avoid circular stirring or whipping, which traps air and creates pinholes that only show up after you’ve sanded. Work quickly but methodically; the clock starts the moment hardener touches filler. In warm conditions (above 75°F) you’ll have less working time, so mix only what you can apply in 3-4 minutes.
Check for Full Mix
Hold your spreader up and inspect the filler’s color in good light. Any marbling, streaks, or darker patches mean unmixed hardener, and those spots won’t cure at the same rate as the rest. Scrape the edges of your pile back into the center and fold again until the color is uniform.
Working Time and Cure Stages
From the moment you finish mixing, you have roughly 5-8 minutes of workable time before Bondo begins to set. The filler will feel warm to the touch as the chemical reaction accelerates — that’s your signal to finish spreading and shaping.
Once applied, body filler goes through three stages: wet (still spreadable), tacky (surface firms up but filler is still soft underneath), and fully cured (hard enough to sand). Most Bondo formulations reach the tacky stage in 10-15 minutes and full cure in 20-30 minutes at room temperature. Humidity and temperature swing these times by several minutes in either direction.
Don’t try to sand during the tacky stage. The filler will gum up your paper and pull away from the panel. Wait until it’s fully hard and cool to the touch, then start with 80-grit to shape and move up to finer grits for final smoothing.

Troubleshooting Common Mixing Problems
If your mixed filler kicks off in under two minutes, you’ve added too much hardener — cut your ribbon in half next time. If it’s still soft after 30 minutes, you either undermixed or used too little hardener; scrape it off and start over with a fresh batch.
Pinholes that appear after sanding usually trace back to air whipped in during mixing or moisture on the substrate. Make sure the repair area is clean, dry, and free of oils before you apply filler. Surface rust or old paint can also prevent proper adhesion, so sand down to bare metal or sound substrate first.
Shelf Life and Storage
Body filler and hardener both have limited shelf lives. Filler that’s dried out or separated in the can won’t mix properly, and old hardener loses potency (forcing you to add more, which throws off the ratio). Store opened cans tightly sealed in a cool, dry place, and replace hardener tubes every 12-18 months even if they still squeeze out cream.
Getting the Mix Right Every Time
Mixing body filler isn’t complicated, but it’s unforgiving if you skip steps or rush the process. The 1900 ratio — 2% hardener by volume — gives you the working time and cure properties that make repairs manageable, whether you’re filling a door ding or rebuilding a quarter panel.
Measure your hardener carefully, fold it through the filler until no streaks remain, and apply it to clean, prepped substrate. Give it the full cure time before sanding, and you’ll have a rock-hard surface that shapes cleanly and bonds for the long haul. We’ve been guiding DIYers and pros through these steps for decades, and the fundamentals haven’t changed — because they work.
Notes
The 1900 reference describes the precise hardener-to-filler proportion used in professional body shops — roughly 2% hardener by volume. It ensures the filler cures in 5-10 minutes with enough working time to spread and shape, without kicking off too fast or staying soft.
This ratio translates to about a 1-inch ribbon of cream hardener per golf-ball-sized dollop of filler. The exact amount varies slightly by temperature and humidity, but staying close to this standard prevents most mixing problems.
You have roughly 5-8 minutes of workable time after mixing before Bondo begins to firm up. The filler will feel noticeably warm as the chemical reaction accelerates — that’s your final signal to finish spreading.
In hot weather or if you’ve added extra hardener, working time drops to 3-4 minutes. Mix only what you can apply in one session, and have your spreader and surface prep done before you start mixing.
Adding extra hardener does speed cure time, but it also shortens your working window to under two minutes and can cause the filler to crack or shrink as it cures. Stick to the 2% ratio for best results.
If you need faster turnaround, use a heat lamp after application to gently warm the filler and accelerate the cure — but never add more than the recommended hardener amount just to save time.
Pinholes usually come from air bubbles whipped into the filler during mixing. Use a folding technique with your spreader instead of circular stirring, and avoid trapping air as you blend hardener through the filler.
Moisture or contaminants on the substrate can also cause pinholes. Make sure the repair area is clean, dry, and sanded to bare metal or sound substrate before applying filler.
Unmixed streaks of hardener create soft spots that never fully cure, leaving you with a repair that stays tacky or gummy in patches. Those areas won’t sand cleanly and can fail weeks or months later.
Always fold the hardener through the filler until the color is completely uniform with no marbling or dark streaks. It takes an extra 30 seconds but prevents hours of rework.
Body filler is ready to sand when it’s fully hard and cool to the touch — typically 20-30 minutes after application at room temperature. If you try to sand during the tacky stage (10-15 minutes), the filler will gum up your sandpaper and pull away from the panel.
Press a fingernail into an edge of the filler; if it leaves an indent, wait another 5-10 minutes. Once it’s cured, start shaping with 80-grit and work up to finer grits for final smoothing.